Open the Terminal on the Darkbox

When the Terminal opens, it should look like this:

To download Epson drivers on the Darkbox, from the Terminal, enter the code below, one line at a time, pressing "Enter" after each line. You can paste in the Terminal, by Right-Clicking and selecting "Paste" from the menu.
cd ~/Downloads
wget https://d.pr/IYyFuj+ -O drivers-epson.zip
sudo rm -rf /usr/share/cups/model/epson
sudo rm -rf /usr/lib/cups/filter/rastertoepsonsimple
unzip drivers-epson.zip
sudo ./setup
cd ~/Downloads
wget https://d.pr/IYyFuj+ -O drivers-epson.zip
sudo rm -rf /usr/share/cups/model/epson
sudo rm -rf /usr/lib/cups/filter/rastertoepsonsimple
unzip drivers-epson.zip
sudo ./setup
Next, open the Chrome Browser

Navigate to 127.0.0.1:631 by entering it in the navigation bar and pressing enter. This will open CUPs so you can manage the printers.

Select the Administration Tab and then select "Add Printer". At this point you may be asked for credentials:
User: pi
Password: darkbox

Under Local Printer (if the printer is connected to the Darkbox) you will see an option, in this case it says "Unknown" sometimes, it will say the printer's name.
If you ONLY see the "VNC Remote Printer (VNC Printer) option, it means the printer is either not connected to the Darkbox or not powered on.
Select Unknown and then press the Continue button at the bottom of the page.

Next, name the printer, this will be the same name you use in the Station configuration for the printer. You CANNOT use spaces in the name. Also, don't use "/" or "#" in the printer name. Press the Continue button after you have entered the name.

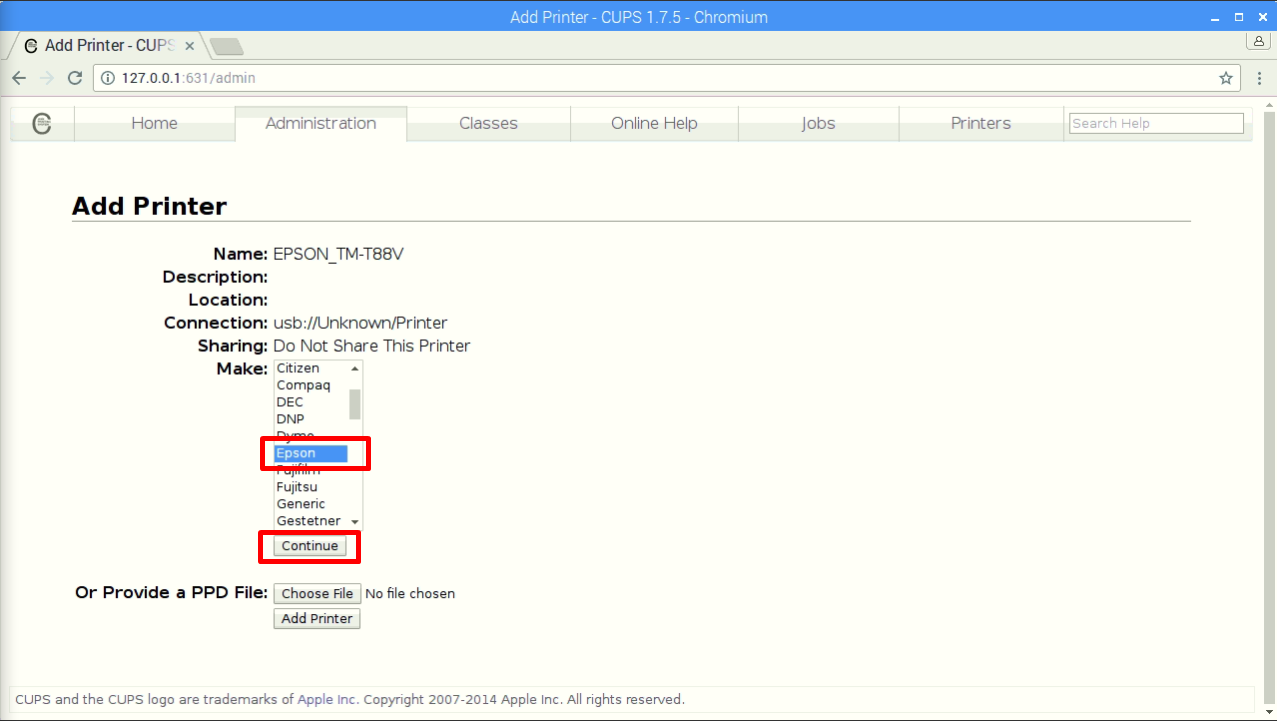
On the next screen, we select the drivers that will be used for the printer. Here we need to scroll down the list until we find "Epson", then press the Continue button.
From the Model list, select Epson TM Simple (en), this can be used Epson TM receipt printers and any generic Esc/POS printer. Once selected press the Add Printer button.

Select the Media Size: 80mm * 200mm and then select the Policies tab.

Set the Policies as follows:
Error Policy: abort-job
Operation Policy: default
Then press the Set Default Options button.

The printer has been successfully configured. The system will navigate you to the page below. If you send a test print, you will be able to see it in the printer queue. Just press the Show All Jobs or Show Completed Jobs. Depending on the timing you may have to push one or the other. Just try one or the other a couple of times after sending the test print, until you see the job listed on the bottom.

If the print request reaches the Printer, you'll see the job in the panel below and any errors returned from the printer if there were any.
